Getting Started with FreshBooks NodeJS SDK
In this tutorial, we’ll be looking into the FreshBooks Node.js SDK and how simple and easy it is to create, update and fetch Invoices, Expenses, Clients, Items, Payments, Projects, Time Entries etc. The SDK handles HTTP calls, retries, consistent request and response structures, and more. We have done the heavy-lifting making it super convenient for you! This way you get to focus on your business logic rather than figuring out how the FreshBooks API works.
Pre-requisites
- FreshBooks Developer account. If you don’t have one, you can create one here
- How to authenticate on the FreshBooks API using Oauth2.0. No idea how to do that, we have an excellent tutorial
- A little knowledge of Node.js
- A simple code editor (Good ones include: VS Code, Sublime, BBEdit, Notepad++, Nova)
Let’s get started!
1. Install the FreshBooks Nodejs SDK
In your Node project directory, install the FreshBooks NodeJs Client via npm or yarn
npm install @freshbooks/api
or
yarn install @freshbooks/api
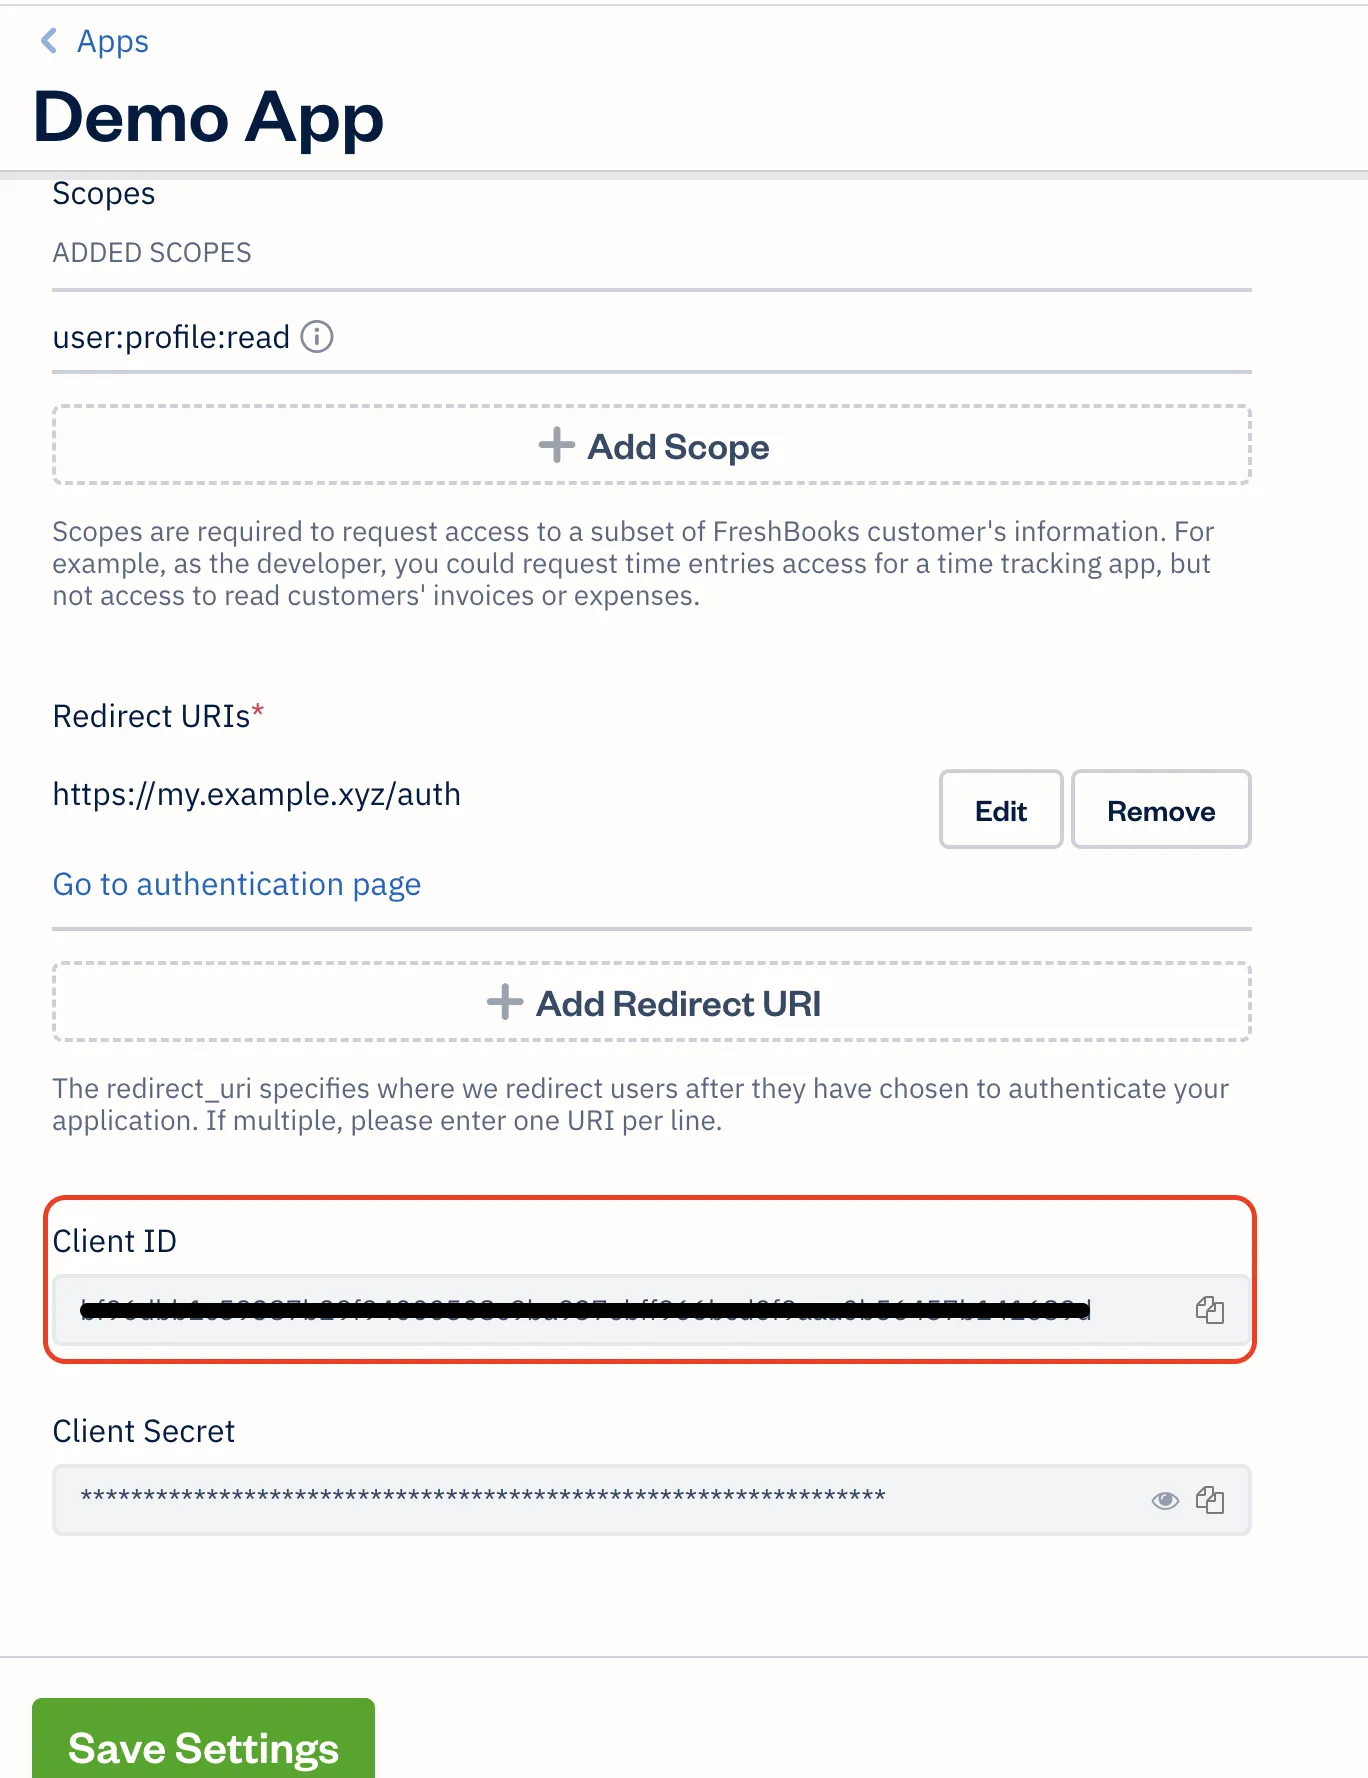
2. Get your FreshBooks Client ID
Login to the FreshBooks Dashboard, Click on the Settings/Gear Icon, click on Developer Portal, click on your OAuth app and then note the Client ID. You’ll need it (This tutorial assumes you have created an existing Oauth App in the past and understand the dynamics of FreshBooks Authentication. If you haven’t, then this tutorial will guide you on how to create one.)


3. Instantiate the FreshBooks Client
// Create a logger
const logger = winston.createLogger();

const CLIENT_ID = '<YOUR APP CLIENT ID>';

// Get token from authentication or configuration
const token = '<A VALID ACCESS TOKEN>';

// Instantiate new FreshBooks API client
const freshBooksClient = new Client(CLIENT_ID, { accessToken: token }, logger);
Set a value for your Client ID and your Access Token. Again, see this tutorial on how to manually generate an Access Token. We also provide code examples of getting this token in our SDK in our documentation.
4. Confirm Instantiation
Using the function below, we can confirm the instantiations works:
const confirmClientInstantiation = async () => {
   try {
      const {
         data: { firstName, roles }
      } = await freshBooksClient.users.me();
      accountId = roles[0].accountId;

      logger.info(`Hello ${firstName}`)
      return {
         firstName,
         accountId
      }
   } catch ({code, message }) {
      // Handle error if API call failed
      logger.error(`Error fetching user: ${code} - ${message}`)
      return {
         error: { code, message }
      }
  }
}
console.log(await confirmClientInstantiation());
If everything works as expected you should see a response similar to that below when you invoke the function. It also returns some useful information (especially the accountId. Store in a variable, You’ll need it in other method calls)
If there is something wrong, you will receive a response that looks like this:
{ "firstName":"John", "accountId":"Zz2EMMR" }
If there is something wrong, you will receive a response that looks like this:
{
   error: {
      code: 'unauthenticated',
      message: 'This action requires authentication to continue.'
   }
}
4. List Expenses
If everything works as expected, you should be able to use the client to interact with FreshBooks on behalf of that account. Below is an example of listing Expenses from the account.
//Fetch Expenses
const fetchExpenses = async () => {
   try {
      const { ok, data } = await freshBooksClient.expenses.list(accountId);
      return ok && data;
   } catch ({ code, message }) {
      console.error(`Error fetching expenses for accountid:  ${accountId}. The response message got was ${code} - ${message}`);
   }
}
console.log(await fetchExpenses());
If everything checks out, you should get a list of expenses These expenses are also listed on the FreshBooks Dashboard
{
   expenses: [
      {
         id: '7538415',
         …
         taxAmount2: null,
         taxAmount1: null,
         visState: 0,
         status: 0,
         vendor: 'FreshBooks Payments',
         notes: 'CC Payment Transaction Fee Invoice: #2021-09',
         updated: 2021-04-17T06:45:36.000Z,
         ...
      }
   ]
}
Conclusion
This implementation simply scratched the surface of the possibilities of the Node.js SDK as there are several use cases that can be achieved with it. Again, there are more examples in our SDK documentation.
Did you find this tutorial helpful? Did it spark up your imagination? Let us know about the apps you’re creating, or about new ways you’re integrating your business with FreshBooks.
Happy Coding
Still, have questions? Something isn’t working? Raise an issue on our GitHub repo or reach out to api@freshbooks.com.
We’ll respond to your request as quickly as we can!

